It's easy to think a few traps will solve a mouse problem. I've seen it countless times—a homeowner buys a pack of traps, catches a mouse or two, and thinks the coast is clear. But that's a reactive approach, and it almost never provides a permanent fix.
Truly mouse proofing your home isn't about catching the occasional intruder. It's a proactive strategy to permanently seal them out, protecting your property and health from what's almost always an ongoing threat.
Why Traps Alone Will Never Solve Your Mouse Problem
That moment you see a mouse scurry across the floor often triggers an immediate trip to the hardware store for traps or poison. While these methods can certainly catch an existing rodent, they do absolutely nothing to address the root of the problem: the entry points.
That one mouse you saw? Think of it as a scout for a much larger, hidden population. Traps are a temporary fix for a symptom, not the cure. For every mouse you catch, I can almost guarantee several more are ready to follow the exact same path into your home. This cycle of catching and re-infesting will continue indefinitely unless you shift your focus from removal to exclusion.
The Limits of a Reactive Approach
Relying solely on traps creates a dangerous false sense of security. You might go weeks without seeing a mouse and assume the issue is resolved. But in reality, you've only dealt with the individuals bold enough to venture out in the open. Behind your walls, others are likely nesting, breeding, and causing serious damage.
This reactive strategy completely ignores the real dangers mice pose:
- Structural Damage: Mice have to gnaw constantly to keep their incisors filed down. They’ll chew through drywall, wood, insulation, and even electrical wiring, which creates a very real fire hazard.
- Contamination of Your Space: A single mouse can produce 40 to 100 droppings per day. These get left everywhere they travel—including your kitchen counters, inside cupboards, and in your pantry.
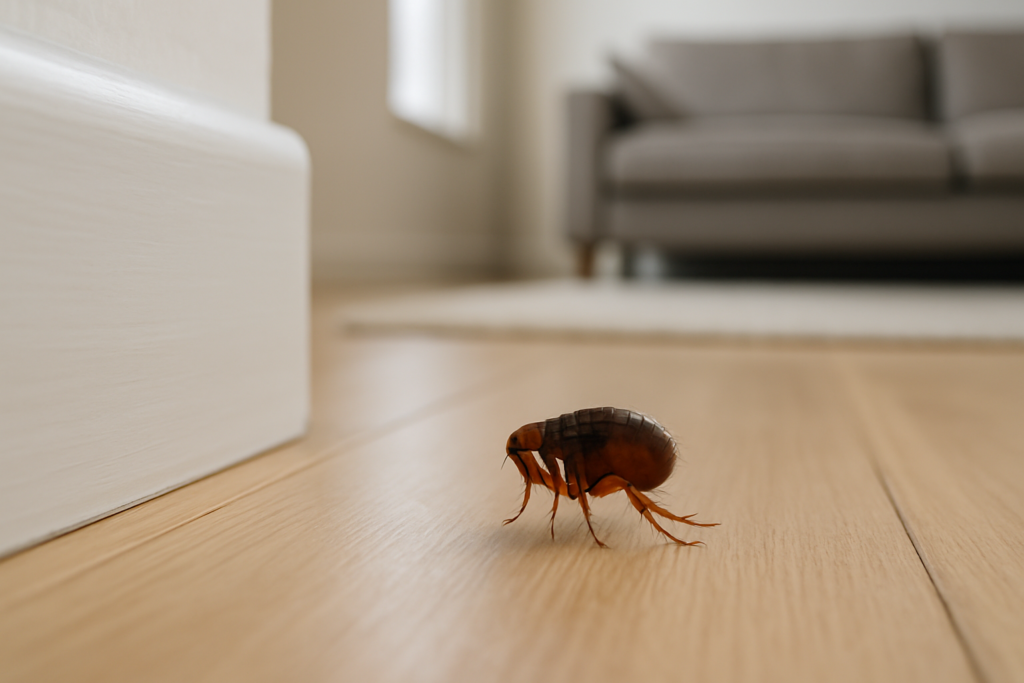
Health Risks Beyond the Obvious
The health implications of a mouse infestation go far beyond contaminated food. Mice shed dander and leave behind urine and droppings that release microscopic allergens into the air. If anyone in your family has asthma or other respiratory issues, this can be a serious health trigger.
Integrated Pest Management (IPM) is the professional standard for a reason: it works. It prioritizes sealing entry points and thorough cleaning over just setting traps. Studies have shown that combining hole-sealing with copper mesh, deep cleaning, and using targeted low-toxicity traps can slash mouse allergens by more than 75%. Homes that achieved this level of allergen reduction also reported fewer missed school days for children and better sleep for the whole family. You can dig into the study's findings yourself on PMC.
Ultimately, effective mouse proofing is about building a fortress. It means methodically sealing every last crack and crevice, making your property completely inhospitable, and stopping infestations before they ever get a chance to start. From my experience, this is the only way to achieve real, lasting peace of mind.
How to Find Every Mouse Entry Point in Your Home

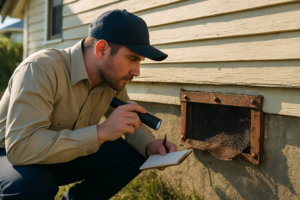
To truly mouse-proof your home, you have to think like a mouse. That means becoming a detective and understanding that they can squeeze through an opening the size of a dime. Your mission is to find and seal every last one of those potential entry points.
This isn't a quick walk-around. It requires a meticulous, systematic inspection of your home's entire envelope, both inside and out.
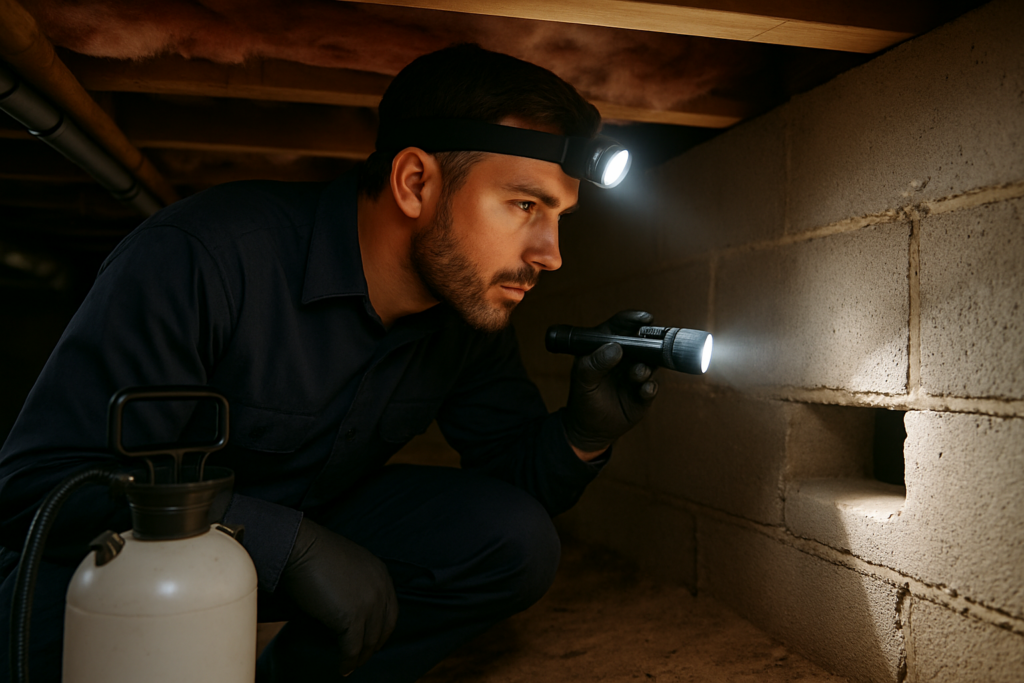
Your most important tool for this job is a powerful flashlight. But here's a pro tip: don't just shine it straight on. Hold it at a sharp, low angle against surfaces. This technique, which we call "raking light," casts long shadows that reveal tiny cracks, gaps, and holes you'd otherwise miss. As you inspect, use your hands to feel for drafts—a dead giveaway of an opening to the outside.
Your Exterior Inspection Checklist
Always start your search on the outside of your house. This is where mice first get in. You need to work your way around the entire perimeter, from the foundation all the way up to the roofline, paying close attention to the usual suspects. For a truly thorough job, it helps to follow a comprehensive building inspection checklist.
Here’s what to look for:
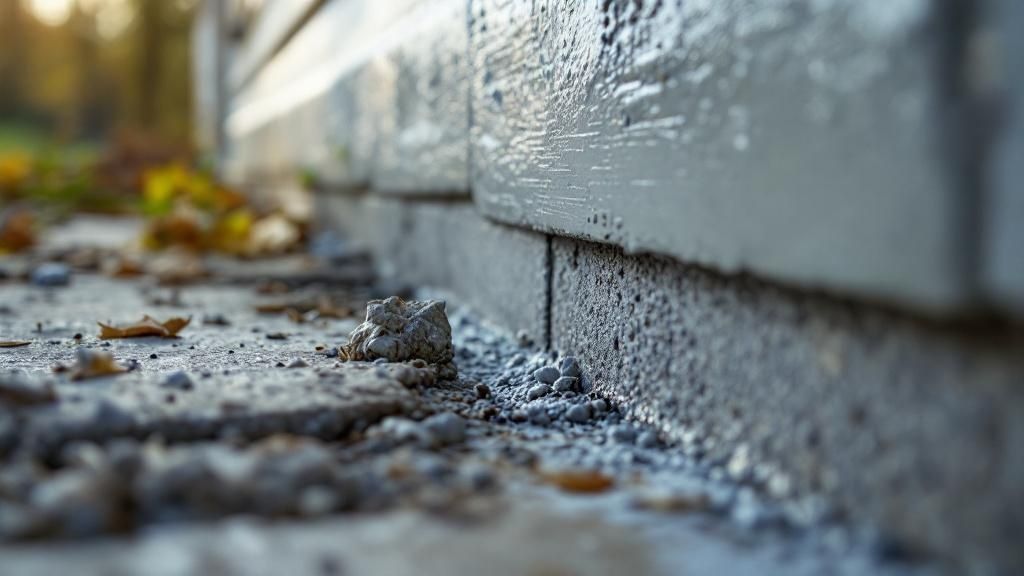
- Foundation Flaws: Check for any cracks in the foundation, no matter how small they seem. Pay special attention to the sill plate—that spot where the wooden frame of your house rests on the concrete.
- Utility Penetrations: This is a huge one. Look closely where pipes (for gas, water, or electrical) and cables (phone, TV) enter your home. Builders often leave gaps around these that are far too large.
- Vents and Weep Holes: Dryer vents, attic vents, and even the tiny weep holes in brick siding are wide-open doors for rodents if they aren't properly screened.
- Doors and Windows: Inspect the seals around all your exterior doors. The rubber threshold on a garage door is often the first thing to wear out, leaving a significant gap. Don't forget to check window frames and screens for any damage.
Interior Hiding Spots
Once you've circled the exterior, it's time to move inside. While nothing beats a professional assessment, you can spot many problem areas on your own. A detailed look at your home's interior is a crucial part of any good home pest inspection in Santa Cruz.
Pro Tip: Don't forget to look up! The roofline, where the roof meets the walls (the soffit and fascia), is an entry point people almost always miss. Damaged or warped boards can create the perfect gap for a mouse to climb into your attic.
Inside, focus on where walls meet floors, especially in those hidden corners behind furniture. Get your flashlight and check under sinks and behind appliances like the stove and refrigerator. You're looking for the holes where plumbing and gas lines come through the drywall.
By creating a detailed map of all these weak points, you'll be perfectly prepared for the next step: sealing them up for good.
Choosing Materials That Mice Can't Chew Through
Alright, you’ve done the detective work and mapped out every potential mouse highway into your home. This next step is where the rubber meets the road, and frankly, it's where most DIY mouse-proofing attempts fall apart.
It’s tempting to grab a can of expanding foam, spray it into a gap, and call it a day. I’ve seen it a hundred times. But to a mouse, that foam is just a minor roadblock, not a dead end. Their teeth are incredibly strong, and they'll shred through soft materials like foam, wood putty, rubber, or plastic before you even know they're back.
To win this battle, you need to think like a mouse and use materials that they physically cannot defeat.
Your Gnaw-Proof Toolkit
Your strategy should be about creating a layered defense. First, you install a material that stops their teeth cold. Then, you use a sealant to lock it in place and block any tempting drafts.
When you head to the hardware store, these are the items that should be at the top of your list:
- Coarse Steel Wool: This is a classic for a reason. When a mouse tries to chew it, the sharp metal fibers poke and irritate its mouth and gums, forcing it to give up. It’s perfect for stuffing into small, awkward gaps.
- Copper Mesh: This is my go-to alternative to steel wool, especially for areas that might get damp, like around plumbing pipes. Copper is rust-proof and just as tough for mice to chew. It's also less conductive, making it a safer pick for gaps near electrical wiring.
- Hardware Cloth: For larger openings like vents, soffit gaps, or holes in the foundation, hardware cloth is non-negotiable. It's a heavy-duty wire mesh that provides a formidable barrier. Make sure you get a mesh with openings of 1/4 inch or smaller.
A key takeaway from my years in this field: you have to make the effort of getting inside not worth the reward. Mice are creatures of instinct. If they hit a barrier that’s painful or impossible to get through, they’ll almost always move on to find an easier target.
Applying Materials for Maximum Effect
How you install these materials is just as important as what you use. For a small crack, don't be shy—pack it tightly with steel wool or copper mesh. I use a screwdriver or a putty knife to shove the material deep into the opening, leaving no weak spots.
Once it's packed, seal over the repair with a high-quality caulk or sealant. This accomplishes two things: it secures the mesh so it can't be pulled out, and it stops the airflow that first attracted the mouse to the hole.
Exclusion Material Comparison Guide
Choosing the right material for the job can feel overwhelming. To make it easier, I've put together this quick comparison table based on what I use in the field every day. This guide breaks down the best options for sealing up rodent entry points for good.
| Material | Effectiveness (Anti-Gnaw) | Best For | Application Tip |
|---|---|---|---|
| Steel Wool | High | Small-to-medium dry, irregular gaps (e.g., around indoor pipes, wall cracks). | Pack it very densely with a screwdriver. Seal over with caulk to prevent rust and secure it. |
| Copper Mesh | High | Damp areas, gaps near electrical wiring, and any small-to-medium openings. | Rust-proof and less conductive than steel wool. Great for exterior pipe entries. |
| Hardware Cloth | Very High | Large openings (e.g., vents, soffits, foundation gaps). Use a 1/4" or smaller mesh. | Cut to size with tin snips and secure firmly with screws or staples. Overlap the edges. |
| Sheet Metal | Very High | Patching large holes in siding, garage doors, or foundation walls. | Cut to fit and secure with screws. Ensures a completely impenetrable barrier. |
| Caulk/Sealant | Low (on its own) | Sealing over other materials like mesh; tiny hairline cracks. | Never use it as the primary barrier. Its job is to block drafts and hold tougher materials in place. |
| Expanding Foam | Very Low | Absolutely not recommended as a standalone barrier. Mice chew through it easily. | Only use it to hold other materials (like steel wool) inside a wall void before sealing the surface. |
Ultimately, the best defense is a smart combination of these materials. Using the right tool for each specific vulnerability is what separates a temporary fix from a long-term solution.
Don't forget to look at the biggest moving parts of your home's exterior. Understanding the different types of exterior doors and how they're built can reveal major weak points. A worn-out door sweep or a hollow-core door can be an open invitation. A solid door with a tight-fitting threshold is one of the most important components of a truly mouse-proof home.
Your Action Plan for Sealing Your Home
Alright, you've done the detective work with your inspection map and gathered your materials. Now it's time to get your hands dirty and move from planning to action. This is where we build a fortress that mice simply can't get into. It’s about more than just plugging holes; it’s about using the right materials the right way to create barriers that last.
Your first move should be to tackle those small, easy-to-overlook gaps. Let’s think about a classic weak spot: the space where a water pipe enters the wall under your kitchen sink. Don't just slap some caulk on it. First, take a screwdriver and tightly pack the opening with copper mesh. Then, apply a solid bead of high-quality silicone caulk over the mesh. This creates a seal that’s both airtight and completely gnaw-proof. Trust me, this two-step process is the key to long-term success.
The infographic below really breaks down the core ideas of a solid mouse-proofing strategy, showing how you move from exclusion to sanitation.
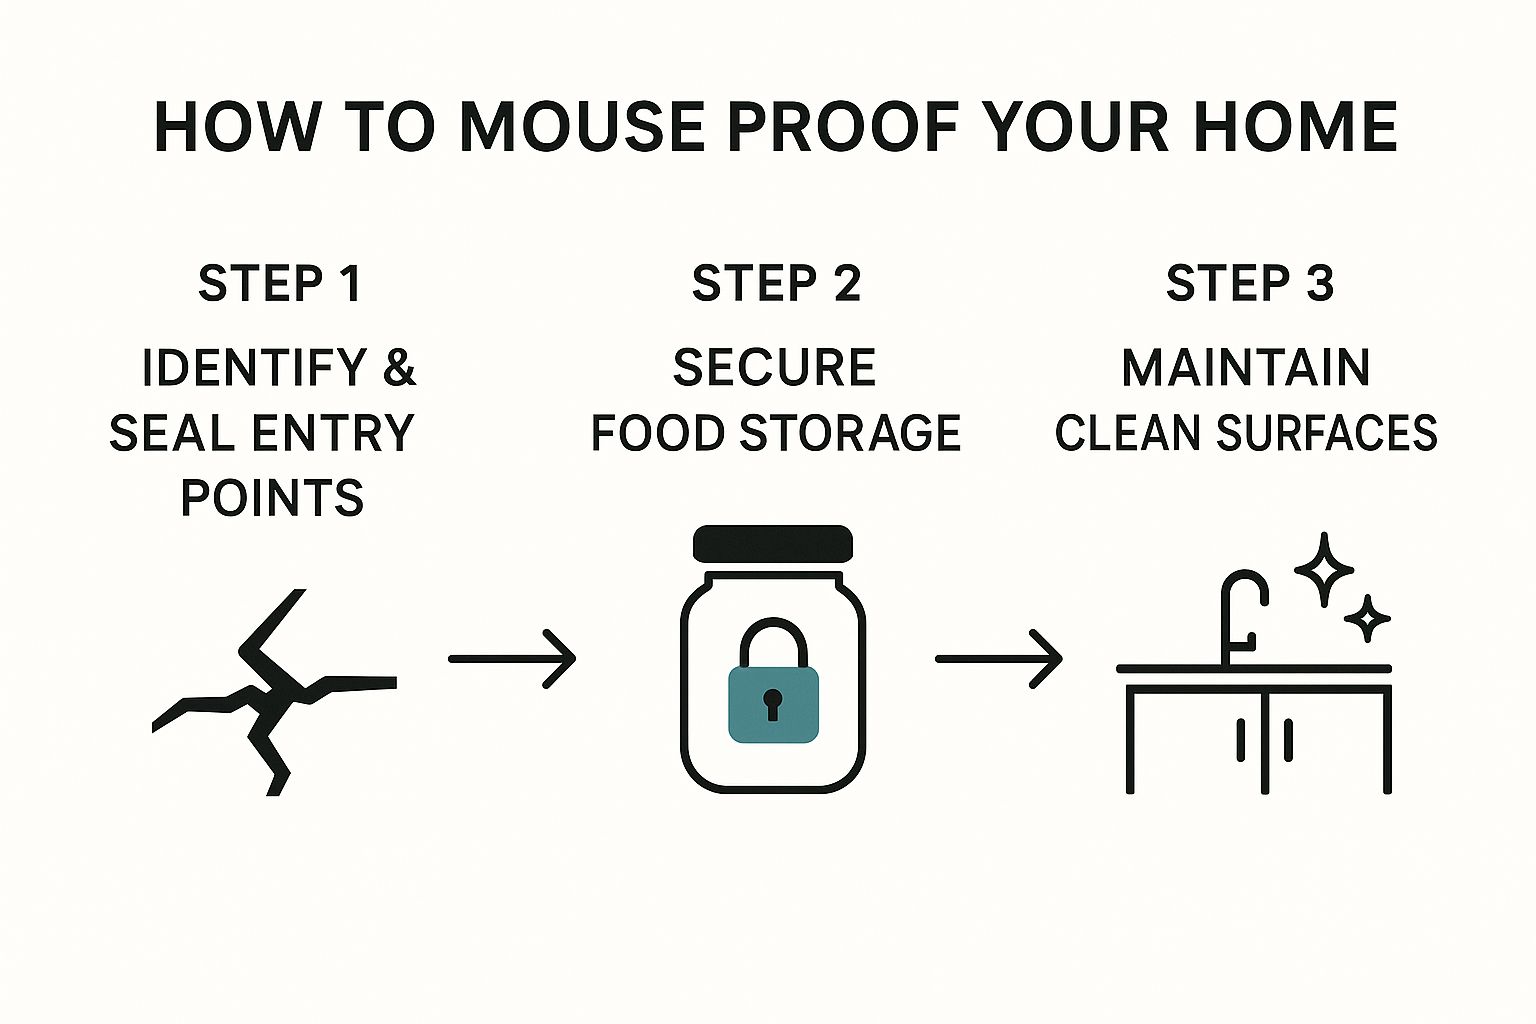
As you can see, sealing every entry point is the foundation. After that, it's all about making your home less inviting by managing food sources and keeping things clean.
Tackling Specific Vulnerabilities
Some parts of your home need special attention. We need to think beyond simple cracks and focus on these common weak points:
- Garage Doors: That worn-out rubber seal at the bottom of your garage door is basically a welcome mat for mice. Swapping it out for a new, rodent-proof threshold seal is a weekend project that offers a huge return on your time.
- Chimneys: An uncapped chimney is a direct highway into your home. It’s non-negotiable—you need to install a chimney cap that has a built-in spark arrestor screen.
- Vents and Screens: Make sure every vent—attic, soffit, and dryer—is covered with 1/4-inch hardware cloth. This goes for your windows, too. For guidance on properly installing screens so they fit snugly, it's always smart to consult a guide.
Sealing Interior Gaps
Once the outside of your home is locked down, it's time to turn your focus inward. The goal here is to seal off the secret passages mice use to travel between rooms and floors. By doing this, you compartmentalize your home, which stops any rodents that might already be trapped inside from getting to important areas like your kitchen.
My personal rule of thumb is to seal everything, even if you think a mouse couldn't possibly squeeze through. I've seen them pop out from the tiny gap behind a stove's gas line or the oversized hole cut for a dishwasher drain hose. Every single unsealed opening is a potential highway.
Check behind and under all your major appliances. If you can, pull them away from the wall and use your copper mesh and caulk combo on any openings for plumbing or electrical lines. Do the same for gaps around radiator pipes or where forced-air vents meet the floor. These interior seals are a critical part of a strategy that actually works.
For homeowners who want a more structured, professional framework to follow, learning about the best rodent prevention plan for Santa Cruz can be incredibly helpful.
Each seal you apply brings you one step closer to a permanently mouse-free home. Be patient, be thorough, and remember that every gap you close tightens your defenses and delivers lasting peace of mind.
Make Your Property an Unattractive Target for Rodents
Sealing every last crack and crevice is the foundation of mouse-proofing your home, but your job isn’t finished just yet. Now, it's time to roll up the welcome mat. Mice are in a constant, desperate search for three things: food, water, and shelter. When you systematically take these away, you make your property far less appealing, which relieves the constant pressure on your newly sealed defenses.
Think of it this way: a mouse won't waste its time trying to break into a bank vault when there's an open, unguarded buffet right next door. Your goal is to turn your home into that vault. This process starts inside, especially in the kitchen and pantry where food sources are most plentiful.
Eliminating Indoor Attractants
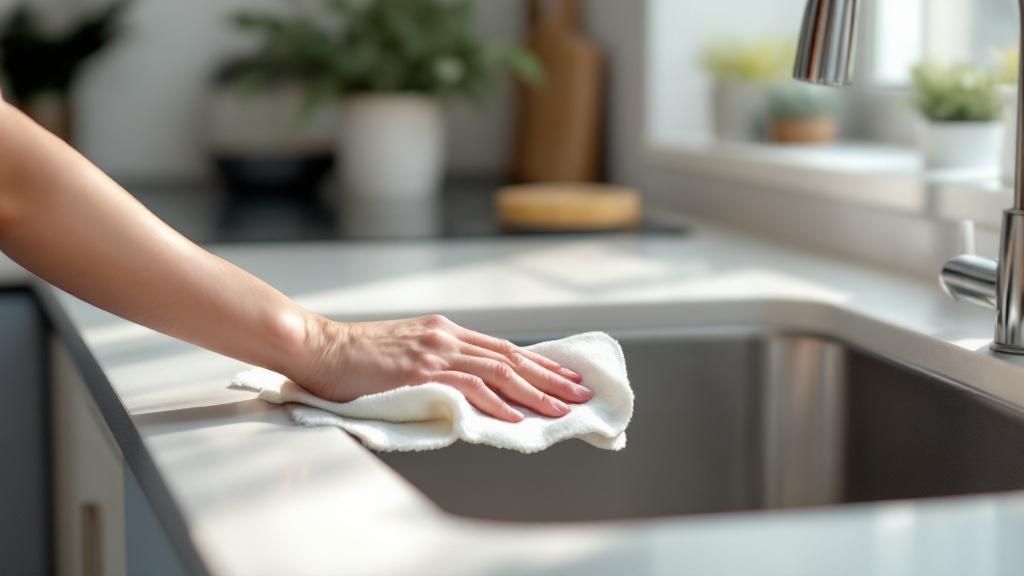
Your kitchen can be a mouse's paradise if you're not careful. Vigilance here is your best tool. It’s not just about wiping up obvious spills; it’s about completely rethinking how you store every single food item in your home.
This means getting serious about your storage solutions. All food, from the cereal and grains in your pantry to your dog’s kibble, must be stored in chew-proof containers. I’ve seen mice chew through just about everything, so cardboard boxes and plastic bags offer zero real protection. Your best bets are glass jars with sealing lids, metal canisters, or thick, hard plastic containers.
Beyond storage, your daily habits have a massive impact:
- Be meticulous about crumbs. Wipe down counters and sweep floors daily. Don't forget to clean under and behind appliances where food bits always seem to end up.
- Secure your trash. Always use a garbage can with a tight-fitting lid. Make it a habit to take the trash out every single night before you go to bed.
- Declutter your spaces. Piles of newspapers, forgotten boxes in the attic, or general clutter in the basement create perfect, undisturbed nesting spots. A clean, organized space is an inhospitable one for mice.
Managing Your Yard and Exterior
Your efforts can't stop at your doorstep. The area immediately surrounding your house can either invite rodents in or actively deter them. A well-maintained yard creates a buffer zone that makes it much harder for mice to even get close to your home’s foundation.
Start by taking a hard look at your landscaping. Overgrown bushes, dense ivy climbing your walls, and low-hanging tree branches are like highways for pests, giving them covered pathways right to your siding and roofline. You need to trim all vegetation back, leaving at least a foot of clearance between any plants and your home's exterior.
Additionally, you need to address these common outdoor attractants:
- Bird Feeders: As much as we love watching birds, feeders are notoriously messy. The spilled seed on the ground is a five-star meal for rodents. I recommend using "no-mess" seed blends or installing a catch tray beneath the feeder.
- Firewood Piles: Never stack firewood against the house. It’s a prime nesting location. Instead, stack it at least 20 feet away from your home and, if possible, elevate it off the ground.
- Trash and Compost Bins: Make sure all your outdoor bins have secure, tight-fitting lids that can’t be easily knocked off or chewed through. For more on this, our guide on how to keep rats away has some great tips that are just as effective for mice.
Rodent infestations are incredibly common in urban areas. Research shows that about one-third of residents in some city surveys reported more than one infestation in a single year. This widespread issue has spurred the adoption of strategies focusing on prevention, like securing food in rodent-proof containers, as a first line of defense over chemical treatments. Learn more about these findings on integrated pest management.
Common Questions About Mouse Proofing Your Home
Even after you've sealed every last gap and cleaned up with a level of enthusiasm you didn't know you had, a few frustrating questions can pop up. Let's be honest, successfully mouse-proofing your home almost always involves a bit of troubleshooting. Here are some quick, no-nonsense answers to the challenges I see homeowners run into all the time.
I've Sealed Everything But Still See Mice
This is hands-down one of the most disheartening things to experience. If you’re still finding evidence of mice after all your hard work, it almost always means there's a less-obvious entry point you missed on the first pass.
It’s time for a second, even more critical, inspection. This time, think like a mouse and look in unconventional spots. Get a flashlight and check the roofline where your walls meet the eaves, look for weep holes in brick siding, or find the small gap where your air conditioning unit's coolant lines enter the house. Remember, you’re hunting for an opening no bigger than a dime.
There's also another possibility: the mice you're seeing were already inside when you sealed up the exterior. If they're "trapped" in, you'll need to use traps to remove the remaining population. This is really the only time trapping should be part of the exclusion process.
Is It Safe to Use Steel Wool Around Electrical Wiring?
No, it is absolutely not safe to stuff steel wool around any electrical wiring, outlets, or junction boxes. Steel wool is highly conductive. If it makes contact with live electrical components, it can easily cause a short circuit and create a serious fire hazard.
For any gaps near your home’s wiring, you need a non-conductive material. Copper mesh is the perfect alternative here. It’s just as good at stopping rodents from chewing through, it won’t rust like steel wool, and most importantly, it won't conduct electricity. It's the only safe choice for these sensitive areas.
When in doubt, safety always wins. If you are even slightly uncertain about working near your home's electrical system, the smartest move is to call a professional electrician or a pest control expert who can handle the job safely.
How Often Should I Inspect My Home After Mouse Proofing?
Once you’ve finished your big mouse-proofing project, the job isn’t quite done forever. Houses settle and shift over time, and storms or seasonal changes can create new weak spots. A good rule of thumb is to do a thorough walk-around inspection at least twice a year.
I always recommend doing one check in the fall, right before mice get serious about finding a warm place for the winter, and another one in the spring. During these inspections, look for new cracks or gaps that might have appeared and, just as importantly, make sure all your previous seals are still intact and haven't been chewed on or damaged.
Can Mice Chew Through Concrete?
While mice can't just chew their way through a solid, properly cured concrete wall, they are masters at exploiting weaknesses. They can and absolutely will gnaw at the edges of small, pre-existing cracks or holes in a foundation, slowly but surely making them bigger over time.
They can also chew through weaker materials like some types of mortar or improperly mixed concrete patching products. This is exactly why it's so critical to seal any crack in your foundation, no matter how small or insignificant it seems at first glance.
Even with the best DIY skills, some jobs just need an expert eye. If you’ve sealed every crack you can find and are still dealing with unwanted visitors, it might be time to bring in backup. The team at West Pest Co. specializes in tracking down those hard-to-find entry points and creating permanent, eco-friendly solutions to keep your home secure. Don't let the frustration win; visit West Pest Co. online to schedule a thorough inspection and get some lasting peace of mind.