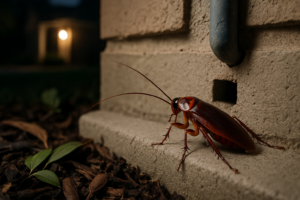
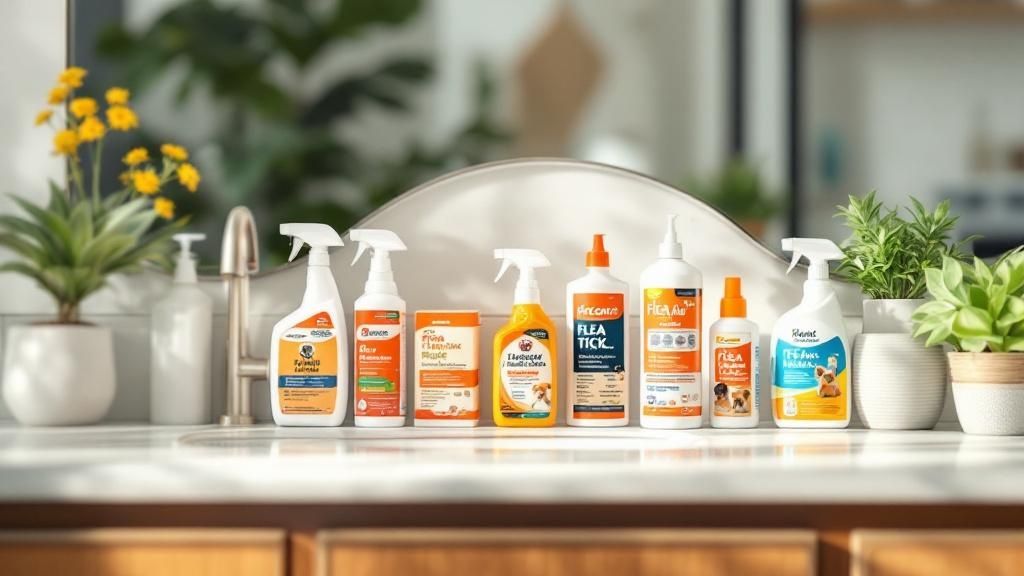
When you find fleas or ticks in your home, the key is to act fast and smart. The most effective flea and tick treatment for home isn't just one thing—it's a coordinated, three-part attack. You need to treat your pets, launch a serious cleaning offensive, and use a targeted treatment with an Insect Growth Regulator (IGR) to stop the next generation in its tracks. This combined approach is the only way to break their life cycle for good and reclaim your home.
Your Immediate Flea and Tick Action Plan

Finding that first flea or tick can send anyone into a spiral of anxiety. But don't panic. A clear, immediate plan turns that stress into decisive action. This isn't about randomly spraying chemicals and hoping for the best; it's about launching a strategic assault based on proven pest management principles.
The biggest mistake people make is relying on a single product. It just doesn't work. The adult fleas and ticks you see are only about 5% of the total population. The other 95% are eggs, larvae, and pupae hiding deep in your carpets, furniture, and floorboards. A successful treatment has to get them all.
The Three Pillars of Immediate Control
Your first response needs to hit the infestation from every angle. Think of it as a three-pronged attack that works together to dismantle the problem.
- Treat the Host (Your Pets): Fleas and ticks use your pets as a mobile home and restaurant. The absolute first move is treating every single animal in your house with a fast-acting, vet-approved preventative. This immediately cuts off their food supply and stops new eggs from being dropped all over your home.
- Attack the Environment (Deep Cleaning): This is where you target that hidden 95% of the flea population. A relentless cleaning schedule is non-negotiable. That means daily vacuuming, washing all bedding and fabrics in hot water, and paying special attention to the spots where pests love to hide.
- Apply Targeted Treatments: After you've cleaned, it's time to apply a product that kills the remaining pests and, more importantly, halts their life cycle. Look for treatments containing an Insect Growth Regulator (IGR). This is the critical ingredient that sterilizes the population by preventing eggs and larvae from ever becoming biting adults.
This comprehensive strategy immediately knocks down the adult population, short-circuits the breeding cycle, and systematically eliminates the next generation before they can emerge.
Key Takeaway: Success isn't about a single magic bullet. It's the consistent and combined effort of treating your pets, deep cleaning your home, and using targeted chemical controls that truly eradicates a flea or tick problem.
Building Your Battle Plan
To put these pillars into practice, you need a clear roadmap. The goal is to move from initial containment to total elimination. Picture your home as a grid—you have to cover every square inch methodically. Start by identifying the high-risk zones where pests hang out, like pet beds, carpets, upholstered furniture, and the dark corners along baseboards.
A common oversight is only focusing on the floor. Flea larvae can wiggle their way into couch cushions, and ticks can climb. Your plan has to be three-dimensional.
To help you get started immediately, we've put together a checklist. Think of this table as your emergency response guide, breaking down the essential first steps so you can tackle the infestation systematically and take back your home.
Immediate Action Checklist for Home Flea and Tick Infestations
| Priority Area | Immediate Action Required | Why It's Critical |
|---|---|---|
| Pets | Administer vet-approved flea/tick treatment. | Stops pets from being a continuous source of new fleas and eggs in the home. |
| Bedding & Linens | Wash all pet and human bedding, throws, and washable rugs in hot water. | Kills all life stages of fleas (eggs, larvae, pupae, adults) hidden in fabrics. |
| Floors & Carpets | Vacuum all carpets, rugs, and hard floors daily. Pay special attention to edges and under furniture. | Removes a significant percentage of eggs, larvae, and adult fleas. The vibration also encourages pupae to hatch, exposing them to treatments. |
| Furniture | Vacuum all upholstered furniture, including under cushions. | Flea larvae feed on organic debris and can thrive deep within furniture fibers. |
| Waste Disposal | Immediately seal and dispose of vacuum bags/canister contents in an outdoor trash can. | Prevents captured fleas and eggs from re-infesting the house. |
| Targeted Treatment | Apply a premise spray or powder with an IGR to carpets, under furniture, and along baseboards. | Kills remaining adults and prevents eggs/larvae from maturing, breaking the life cycle. |
By following this structured plan, you're not just reacting—you're executing a proven strategy to regain control of your living space quickly and effectively.
Uncovering Flea and Tick Hiding Spots
Before you can win the war against fleas and ticks, you need good intel. An effective flea and tick treatment for home isn't about spraying and praying; it's about knowing exactly where your enemy is hiding. This is where you become a pest detective, mapping out the infestation to understand its true scope.
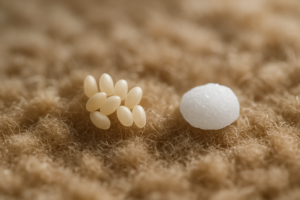
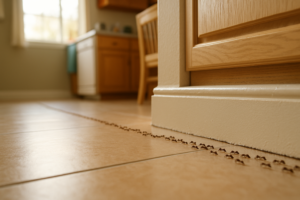
It's a common mistake to only treat the areas where you see adult pests. Here’s a hard truth: the adult fleas you spot on your pet are just the tip of the iceberg, making up only about 5% of the total problem. The other 95%—the eggs, larvae, and pupae—are tucked away deep in your carpets, furniture, and floorboards. Finding these breeding grounds is the single most important step toward getting rid of them for good.
Mastering the 'White Sock Test'
One of the oldest tricks in the book is also one of the best for finding adult fleas: the 'white sock test.' It's a surprisingly effective, low-tech way to see how bad the problem is, especially in carpeted rooms.
Just pull a clean pair of white crew socks up over your pant legs and take a slow walk through the suspected areas. Shuffle your feet a bit as you go. The combination of warmth and vibration wakes up dormant fleas and encourages them to jump.
After a few minutes, stop and have a look at your socks. Any fleas that hitched a ride will stand out as tiny black specks against the white fabric. This simple test gives you a real-time map of where adult fleas are congregating, helping you focus your treatment efforts where they’ll matter most.
Identifying the Telltale Signs
Besides seeing live bugs, you need to train your eye to spot the evidence they leave behind. Fleas and ticks have their own unique calling cards that confirm their presence and point you toward their hangouts.
For fleas, the main piece of evidence you’re hunting for is "flea dirt." This isn't really dirt at all; it's the digested blood and feces from adult fleas. To the naked eye, it looks like tiny specks of coarse black pepper or coffee grounds.
- How to Confirm Flea Dirt: Not sure if it's just debris? Scoop some of the black specks onto a damp white paper towel. If they dissolve and leave behind reddish-brown streaks, you've found flea dirt. That’s your proof that fleas are actively feeding and, more importantly, breeding nearby.
Ticks, on the other hand, are less likely to cause a massive indoor infestation, but they have their preferred ambush spots. When inspecting, you’re looking for the ticks themselves. They can be as small as a poppy seed (nymphs) or as large as a coffee bean if they're engorged. Remember, ticks don't jump or fly; they wait patiently for a host to brush past them.
Expert Insight: Flea pupae are masters of survival. They can stay dormant inside their protective cocoons for months, just waiting for a signal—like the heat, vibration, or carbon dioxide from you or your pet—to emerge. This is why a home that seemed pest-free can suddenly explode with a new wave of fleas. Your inspection has to be thorough enough to uncover these hidden, future threats.
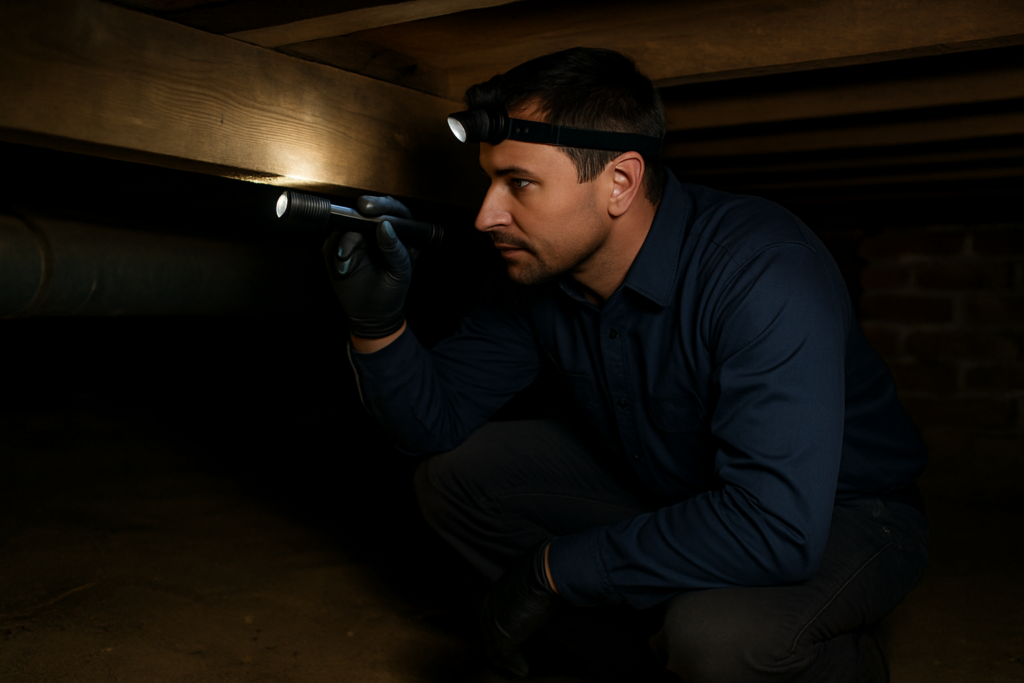
Pinpointing Indoor Pest Hotspots
Alright, it's time to put on your detective hat and grab a flashlight. Let’s systematically search the most common indoor hiding spots. These are the places that offer the darkness, humidity, and food sources (like pet dander and other organic bits) that flea larvae need to thrive.
Primary Investigation Zones:
- Pet Bedding and Hangouts: This is ground zero. Strip and inspect all pet beds, blankets, and crates. Don't forget their favorite spot on the couch or that sunny patch on the rug.
- Carpets and Rugs: Flea larvae hate the light, so they burrow deep into carpet fibers. Pay extra attention to areas where your pets spend most of their time lounging.
- Upholstered Furniture: Sofas and armchairs are prime real estate. Pull off all the cushions and use your flashlight to check every single seam, fold, and crevice.
- Baseboards and Floor Cracks: Those dark, dusty gaps along the wall are perfect hiding places for flea larvae and dormant pupae. A simple trick is to run the edge of a credit card along the baseboard to see if you can scrape out any flea dirt.
- Under Furniture and in Closets: Any dark, low-traffic area is a potential safe house. Don’t skip the bottoms of closets or the space under the entertainment center.
Don't Forget the Outdoor Gateways
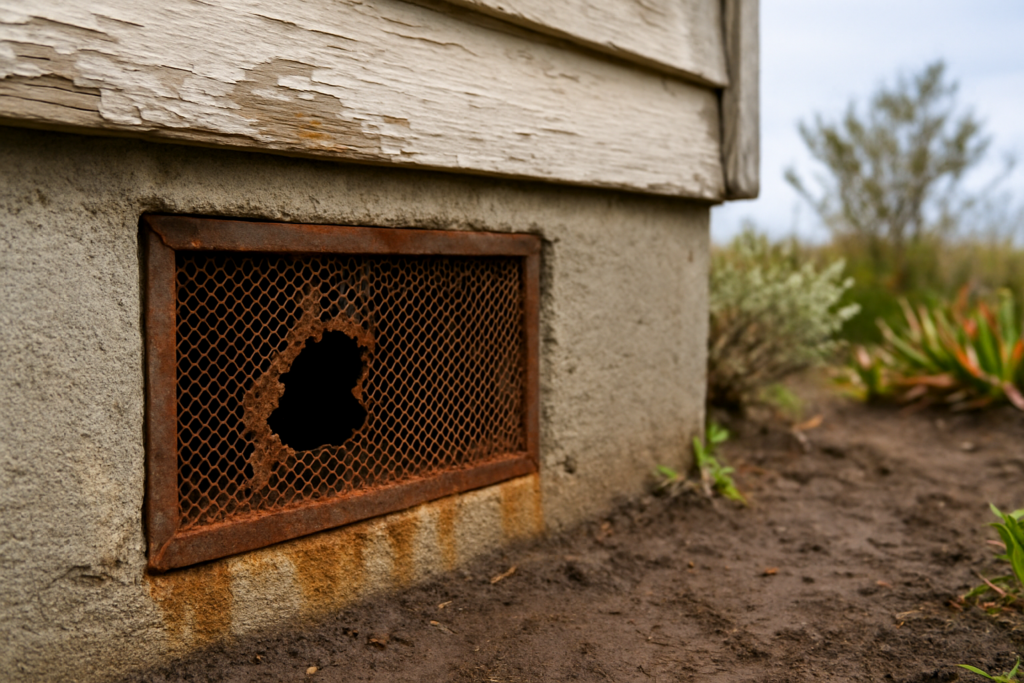
Your search can't stop at the backdoor. While fleas can live their entire lifecycle indoors, ticks are almost always brought in from the outside. A thriving outdoor flea population can also quickly re-infest a freshly treated home.
Take a walk around the immediate perimeter of your house. Look closely at any shady, humid spots where pests love to hang out. Check under decks and porches, in crawl spaces, and in any overgrown, leafy areas of the yard where your pets might rest to escape the sun. Identifying these outdoor hotspots is key to creating a protective barrier and stopping the next invasion before it starts.
You've mapped out the hot spots and confirmed you're dealing with a flea or tick problem. Now comes the big decision: do you roll up your sleeves and tackle this yourself, or is it time to call in the professionals?
Honestly, there's no single right answer here. The best path forward really depends on the scale of your infestation, your budget, how much time you can realistically commit, and your comfort level with handling pest control products. It can feel like a tough call, but breaking it down makes the choice much clearer.
The Do-It-Yourself Approach
Going the DIY route is a lot more involved than just grabbing a can of bug spray and hoping for the best. For it to work, you have to be methodical, thorough, and relentlessly consistent. This is a hands-on job, but it puts you in the driver's seat.
There are several great DIY options out there. The trick is to think beyond just the adult fleas you see and target their entire life cycle.
- Diatomaceous Earth (DE): This fine, powdery substance is a go-to natural option. Food-grade DE is made from fossilized algae and works by physically scratching the waxy outer layer of an insect's exoskeleton, causing them to dehydrate. You'll want to apply a very light dusting in dry areas—think along baseboards, under furniture, and worked into carpet fibers.
- Boric Acid: Similar to DE, boric acid powders (like Borax) act as a stomach poison for flea larvae when they ingest it from the carpet. It’s a long-lasting treatment, but the key is getting it deep into the carpet fibers where the larvae are hiding.
- Targeted Sprays with IGR: This is your most powerful chemical DIY weapon. Look for a spray specifically labeled for indoor or premise use that contains both an adulticide (to kill the adults) and an Insect Growth Regulator (IGR). The IGR is the real game-changer; it prevents flea eggs and larvae from ever growing up, which breaks the life cycle and stops the next generation cold.
No matter which product you choose, safety comes first. Always read the label and follow the instructions to the letter. That means wearing gloves, making sure the area is well-ventilated, and keeping your pets and kids away until everything is completely dry.
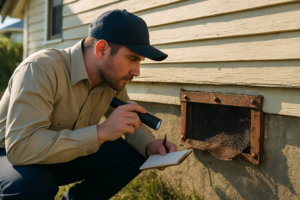
When to Call in the Professionals
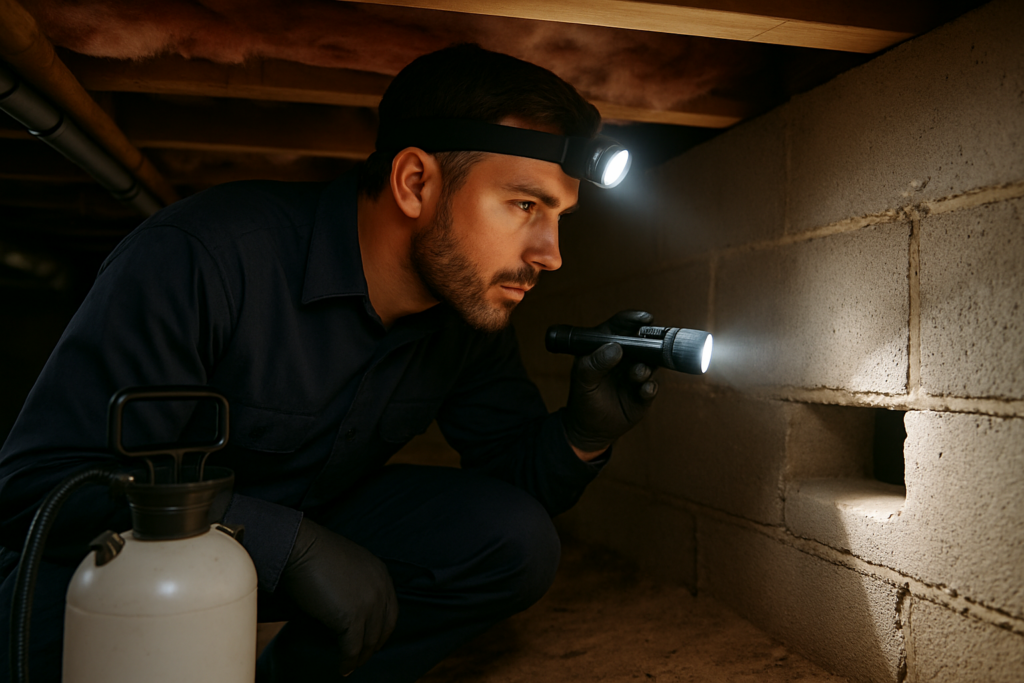
Sometimes, an infestation is simply too big to handle on your own. If you’re facing a severe, widespread problem or you've been fighting it for weeks with no end in sight, it's time to bring in a professional service like West Pest Co.. They bring a level of expertise—and equipment—that you just can't get at the hardware store.
Expert Insight: Professionals have access to commercial-grade treatments and application tools that are far more potent than anything available to consumers. Their training also helps them spot and treat those sneaky, hard-to-reach areas you might otherwise miss.
A good pest control service does more than just spray. They should start with a detailed inspection to figure out exactly what you're dealing with. From there, they'll create a treatment plan specifically for your home.
Before you hire anyone, make sure to ask these questions:
- What products will you use, and are they safe for my kids and pets?
- Will you come back for a follow-up visit to deal with newly hatched fleas?
- Do you guarantee your work?
- What do I need to do to prepare my home before you arrive?
A reputable company will give you straight answers and set clear expectations. They should be upfront that getting rid of fleas is a process, often needing at least two treatments a few weeks apart to completely break the life cycle.
DIY vs Professional Flea and Tick Treatment Comparison
Deciding between tackling a flea or tick problem yourself and calling in a pro can be tricky. Each approach has its own set of pros and cons related to cost, effort, and how quickly you'll see results. This head-to-head comparison should help clarify which path makes the most sense for your specific situation.
| Factor | DIY Treatment | Professional Service |
|---|---|---|
| Severity | Best for minor to moderate infestations caught early. | Necessary for severe, widespread, or persistent infestations. |
| Cost | Generally lower upfront cost for products. | Higher initial investment, but can be more cost-effective long-term. |
| Effectiveness | Can be effective if done correctly and consistently. | Higher success rate due to commercial-grade products and expertise. |
| Time & Effort | Requires significant personal time for application and re-treatment. | Minimal effort required from the homeowner; pros handle all the work. |
| Expertise | Relies on homeowner research and ability to follow instructions. | Leverages trained, licensed technicians who understand pest biology. |
| Guarantee | No guarantee; success depends entirely on your efforts. | Most reputable companies offer a service guarantee and follow-up visits. |
Ultimately, the best choice depends on the scale of your problem and your personal resources. A DIY approach can work for smaller issues if you're diligent, but for a serious infestation that's causing major stress, the expertise and guaranteed results of a professional service are often well worth the cost.
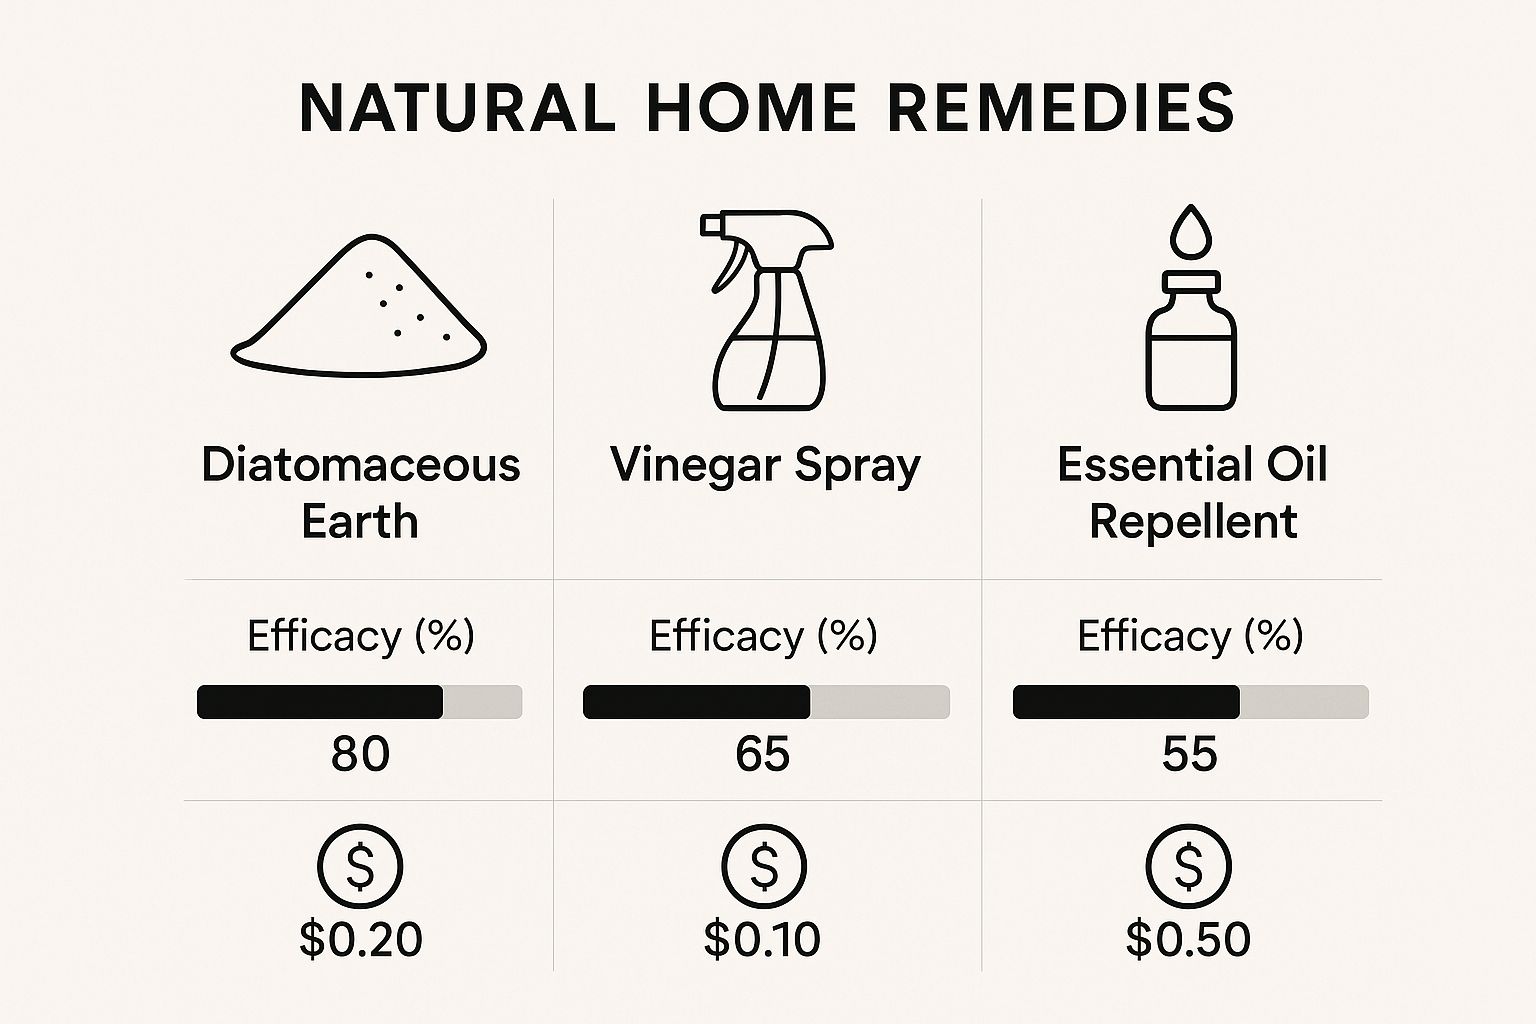
As the infographic highlights, natural options have their place but often require more patience and frequent reapplication. Your final decision should be the one that you feel confident you can see through to the very end, ensuring your home becomes a safe, pest-free space once again.
Your Room-by-Room Treatment Execution Guide

Alright, this is where the real work begins. You’ve scouted the enemy hotspots and picked your weapons. Now it’s time to execute, room by methodical room. A successful flea and tick treatment for home isn't just a quick spray-and-pray mission. It's a systematic assault designed to leave no hiding place untouched and eliminate pests at every single stage of their life cycle.
The key to victory is breaking your house down into manageable zones. If you try to do everything at once, you’re guaranteed to miss spots, leading to frustration and reinfestation. By focusing your full attention on one room at a time, you ensure every surface, fabric, and crevice gets the treatment it needs. This is your battle plan for taking back your space.
First Assault: The Fabric Front
Fleas and ticks love to burrow into fabrics, making your laundry room the first line of attack. From your target room, gather up every single washable item—this means pet bedding, your own bedding, blankets, throws, and even small rugs.
It's absolutely critical to use the hottest water setting the fabric can safely take. The intense heat from both the hot water wash and the dryer cycle is what kills fleas and ticks at all life stages, from the tough-to-kill eggs to the adult pests. Just washing them isn’t enough; it’s the heat that does the heavy lifting.
- Pet Bedding: This is ground zero. Wash all covers and, if possible, the inserts themselves.
- Human Bedding: Strip your beds completely. We're talking sheets, pillowcases, comforters, duvet covers, and mattress pads.
- Other Textiles: Don’t forget the less obvious stuff like couch covers, throw pillows, curtains, and even your pet's favorite soft toys.
Once an item is clean and dry, immediately seal it in a clean plastic bag or move it to a room that has already been fully treated. This simple step prevents clean items from being re-infested while you work on the rest of the house.
The Vacuum Offensive: Deep Cleaning for Victory
Your vacuum cleaner is your best friend in this fight. The mission here goes beyond just tidying up. You are physically removing as many eggs, larvae, pupae, and adult fleas as you can before applying any treatments. But the vacuum does something else just as important: the vibrations stimulate dormant pupae to hatch, forcing the new adult fleas to emerge and expose themselves to the treatment you're about to apply.
Always start with a fresh vacuum bag or an empty canister. Methodically vacuum every single inch of the floor. On carpets, go over high-traffic areas and pet lounging spots multiple times from different directions to really agitate the fibers. Use that crevice tool like a pro—get deep along baseboards, under furniture edges, and into every corner where pests love to hide.
Critical Disposal Step: Do not get lazy here. As soon as you finish vacuuming a room (or when the bag is full), you must immediately remove the vacuum bag or empty the canister. Seal the contents tightly in a plastic bag and take it directly to your outdoor trash can. Skipping this step is like catching the enemy and then letting them go right back inside your house.
Don't stop at the floors. Upholstered furniture needs the same intense focus. Take off all the cushions and vacuum every surface, seam, and crack. Flea larvae thrive on the organic debris found in the dark, hidden crevices of a sofa, making it a perfect nursery.
Applying Your Chosen Treatment
With the room prepped—fabrics laundered and every surface vacuumed—it’s time to bring in the main event. Whether you’ve chosen a natural product like diatomaceous earth or a professional-grade spray with an Insect Growth Regulator (IGR), proper application is what makes or breaks your success.
Safety is paramount. Before you begin, open the windows to ensure the room is well-ventilated. Get kids and pets out of the area and don't let them back in until the treatment is completely dry, according to the product label. Always wear gloves and follow the directions to the letter. More is not better; over-applying can be ineffective and hazardous.
- For Sprays: Apply a light, even mist across carpets, under furniture, along baseboards, and on upholstery (after testing for colorfastness on a small, hidden spot first).
- For Powders: Use an applicator to puff a very fine layer into carpets and under furniture—you should barely be able to see it. Then, use a broom or carpet rake to work it deep into the fibers where the larvae live.
For homes dealing with severe or stubborn infestations, this whole process can feel overwhelming. If you're fighting a losing battle, calling in a professional can be a game-changer. Experts who provide flea and tick control in Santa Cruz County, for example, have access to methods and products that are more effective at breaking the life cycle in complex situations. Their structured, experienced approach ensures no stone is left unturned.
After application, let the room sit undisturbed for the time recommended on the product label. This gives the treatment time to work its magic. By repeating this thorough process in every single room, you create a home environment that is completely hostile to pests, paving the way for long-term freedom from fleas and ticks.
Building a Pest-Free Home for the Long Haul
Getting rid of a flea or tick infestation is a huge relief, but don't celebrate just yet. The job isn't quite done. Real victory comes from building a long-term strategy that keeps these pests from ever coming back. It’s all about shifting from a reactive panic to a proactive defense to keep your home and family safe for good.
The single most important part of this entire strategy? Your pets. They are the number one way fleas and ticks get a free ride back into your house. That’s why consistent, year-round flea and tick medication for every single pet is completely non-negotiable. Even in colder months, dormant pests can wake up, and one missed dose is all it takes to start the cycle all over again.
This isn't just a friendly suggestion; it's your first line of defense. The market for these products reflects how critical they are. The global flea, tick, and heartworm product market was valued at around USD 8.45 billion and is projected to hit nearly USD 17.96 billion by 2032. This boom is fueled by more people owning pets and a better understanding of the health risks involved, from skin irritation to serious illnesses like Lyme disease.
Creating a Pest-Resistant Yard
Your defense plan has to extend beyond your four walls and into your yard, which is often ground zero for an infestation. You don't need to turn your lawn into a concrete slab, but you do need to make it a less welcoming place for fleas and ticks. They absolutely love shady, damp, and overgrown spots.
A few simple landscaping tweaks can make a world of difference:
- Keep Your Grass Short: Ticks are famous for "questing"—climbing up tall grass blades and waiting to latch onto a passing host. Mowing regularly takes away their favorite ambush points.
- Clear Out Leaf Litter and Debris: Piles of leaves, grass clippings, and old wood stacks create the perfect dark, moist hideouts for fleas and ticks to live and breed.
- Create a Barrier: If your yard borders a wooded area, lay down a three-foot-wide barrier of wood chips or gravel. Ticks really don't like crossing these dry, exposed zones.
- Let the Sun In: Prune back trees and shrubs to allow more sunlight to hit the ground. This helps dry out the soil and makes the environment far less hospitable for pests.
Pro Tip: Don't try to tackle the whole yard at once. Focus your energy on the areas where your pets spend the most time—around their favorite napping spots, along the fence lines they patrol, and under any decks or porches where they like to cool off.
The Power of Routine Inspection and Cleaning
Your final layer of defense is simple, old-fashioned vigilance. By getting into a routine of regular cleaning and quick inspections, you can spot new pest activity before it explodes into another full-blown problem. This doesn't have to be some overwhelming chore.
Think of it as a quick weekly check-in. When you're doing your normal vacuuming, just give extra attention to pet bedding, carpets, and other high-traffic areas. Once a month, you could even do the "white sock test" in carpeted rooms for peace of mind. And, of course, make it a habit to check your pets for any hitchhikers after they've been playing outside. Our guide on comprehensive flea and tick prevention offers more great tips on exactly what to look for.
This three-pronged approach—protecting your pets, maintaining your yard, and performing routine checks—is the true cornerstone of keeping your home free from fleas and ticks. It's how you finally stop fighting endless battles and win the war for good.
Your Top Questions About Home Flea and Tick Control
When you're dealing with a flea or tick problem, you've got questions. It's only natural. Below, I've answered some of the most common ones we hear from homeowners, helping you get a clearer picture of what to expect.
A big concern is always the timeline. People want to know when it will all be over, and the honest answer is that it's a marathon, not a sprint. Getting rid of fleas for good requires patience and a consistent game plan.
How Long Does It Really Take to Get Rid of Fleas?
Realistically, you should plan for the process to take anywhere from a few weeks to a couple of months. It all comes down to the flea life cycle. The treatments you apply will kill the adult fleas you see, but the real battle is against the eggs and pupae that are still waiting to hatch.
This is why daily vacuuming and sticking to a treatment schedule—usually reapplying every two to three weeks, depending on the product—is so important. You have to be persistent to break the cycle. To really get why it takes this long, it helps to understand the full life cycle and how long fleas live inside a home.
Are Flea Bombs or Foggers a Good Idea?
This is a common question, and my answer is almost always no. Flea bombs seem like an easy, one-and-done solution, but they're rarely effective. The mist they release just doesn't get where it needs to go.
Think about it: over 90% of the flea population—the eggs, larvae, and pupae—are tucked away deep in carpet fibers, under furniture, and inside cracks. A fogger just can't penetrate those spots. It might kill some of the exposed adults, but the next generation hatches a week later, and you're right back where you started. A much better approach is using targeted sprays with an Insect Growth Regulator (IGR) applied directly to the problem areas.
Expert Insight: It's not just a local problem. The demand for home pest treatments is huge globally. In Europe, the market for these products accounts for over 30% of worldwide revenue, valued at around USD 2.4 billion. The UK alone makes up about USD 403 million of that. This is driven by high pet ownership and a growing awareness of preventive pet care. You can learn more by checking out the flea and tick product market research.
Can I Have a Flea Problem Without Pets?
Absolutely. It's less common, but it definitely happens. Fleas can be left behind by a previous tenant's pets, or they can hitch a ride inside on wildlife. If a raccoon or opossum has been nesting in your crawlspace or attic, they can introduce a serious flea problem.
Once they're in, flea pupae can lie dormant for months. They just wait for a host—in this case, you—to walk by. While the most common species (the cat flea) can't reproduce on human blood alone, they will absolutely bite humans if a pet isn't around.
What Is the Fastest Way to Kill Fleas on Carpet?
For the quickest results on your carpet, you need a one-two punch that gives you both immediate knockdown and long-term control.
- Vacuum Like You Mean It: Start with a thorough vacuuming. Pay extra attention to pet resting spots and high-traffic zones. This will suck up a surprising number of adults, eggs, and larvae right away. And don't forget the most important part: seal the vacuum bag and throw it out immediately.
- Use a Targeted Treatment: Next, apply a high-quality carpet spray or powder made specifically for fleas. The best products contain two key ingredients: an adulticide to kill the adults and an Insect Growth Regulator (IGR) to stop the eggs and larvae from ever growing up.
This combination attacks the infestation from both sides, wiping out the current population while preventing the next one from taking its place.
Don't let pests take over your home. If you're struggling with a stubborn infestation or want to ensure your treatment is done right the first time, trust the experts at West Pest Co. to provide reliable and effective solutions. Contact us today for a comprehensive inspection and customized treatment plan!